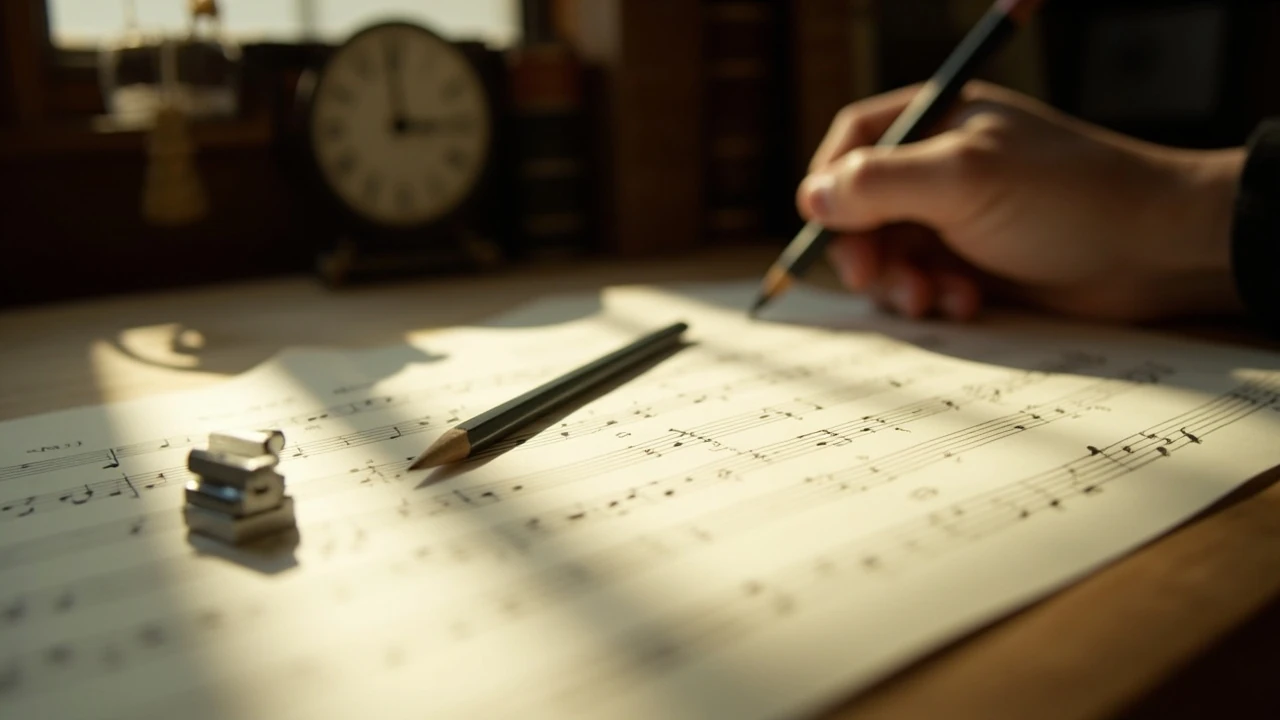
How to read music: a practical beginner’s guide to notation
You open a printed score and the page looks like a small forest of black dots, beams, and strange symbols. Within a few minutes the music feels less like decoration and more like a map. Each element on the page is doing real work: it tells a performer which pitch to choose, how long to hold it, how loudly to play, and how the phrase should breathe. This guide walks through that map one layer at a time, starting with the staff and the notes that sit on it, then moving into rhythm, key signatures, dynamics, and the symbols that shape expression. By the end you should be able to look at a simple piece and predict, with reasonable confidence, what a trained musician will do when they play it.
Reading music is a skill you can build at your own pace. It rewards short, regular practice far more than occasional long sessions. If you can set aside even fifteen minutes a day for two or three weeks, you will move from “I recognise that this is a note” to “I can read a melody slowly in time.” The order below is the order that usually works best: visual framework first, rhythm second, pitch third, expression last.
The five lines and four spaces that hold every note
Western staff notation rests on a simple scaffold: five horizontal lines and the four spaces between them. Together they form the staff, sometimes called the stave. Each line and each space corresponds to a specific pitch in the musical alphabet, which uses the letters A through G and then repeats. The position of a note head on the staff tells you the pitch, and the shape of the note tells you the duration.
To anchor the system, musicians memorise two handy sentences that name the lines and the spaces of the treble clef, the clef most often used for higher voices and the right hand on piano.
- Lines from bottom to top: Every (E), Good (G), Boy (B), Does (D), Fine (F).
- Spaces from bottom to top: spell FACE.
The bass clef, used for the left hand on piano, bass voice, and many low instruments, has its own pair of sentences.
- Lines bottom to top: Good (G), Boys (B), Do (D), Fine (F), Always (A).
- Spaces bottom to top: All (A), Cows (C), Eat (E), Grass (G).
You do not need to memorise both at once. Start with the clef that matches the instrument or voice you care about most, then add the other later. Many beginners get the most mileage from the treble clef, simply because most introductory melodies live there.
Clefs, and why some notes sit above or below the staff
A clef is a symbol placed at the start of the staff to assign a specific pitch to one of the lines. Once a clef is in place, every other line and space falls into a fixed relationship with it. The two clefs you will meet most often are the treble clef (also called the G clef, because its spiral curls around the second line from the bottom, fixing that line as G) and the bass clef (the F clef, whose two dots sit around the second line from the top, fixing that line as F).
Some notes live above the top line or below the bottom line. Rather than drawing endless extra lines, composers add short ledger lines that act like temporary extensions of the staff. A single ledger line through a note fixes the pitch, and a small note head hovering just above the top line, for example, is usually a clear visual cue that you are looking at a higher pitch than the staff itself shows.
Two more clefs appear in choral and intermediate repertoire: the alto clef and the tenor clef. Both centre on middle C, which is why they are useful for viola and the middle range of the piano. You can safely learn these later. The mechanics are identical; only the reference pitch changes.
Note values, and how shapes translate into time
Once you can place a pitch on the staff, the next question is how long to hold it. The note head, stem, and flag together encode duration. A simple rule underpins the whole system: each note value is roughly twice as long as the next note down, and half as long as the next note up. A whole note sits as a hollow oval with no stem; a half note is a hollow oval with a stem; a quarter note fills in the head and adds a stem; an eighth note keeps the filled head and adds a single flag; a sixteenth note carries two flags. When two or more eighth or sixteenth notes share a beam, the beam replaces the individual flags and groups them visually, which is a real aid for reading rhythm at speed.
To keep notation practical, composers add two further tools.
- Dots after a note add half of that note’s value. A dotted quarter is a quarter plus an eighth, a dotted half is a half plus a quarter.
- Ties connect two notes of the same pitch into a single sustained sound, ignoring the rhythmic break between them.
Understanding rests is the other half of rhythm. Each note value has a rest equivalent, and the symbols are easy to confuse at first. A whole rest hangs from the fourth line, a half rest sits on the third line, a quarter rest is a small squiggle that looks like a slanted Z, and an eighth rest is a single flag on a stem. Counting rests correctly is one of the fastest ways to keep a piece together when you play or sing with others.
Time signatures, bars, and the pulse of the music
Notes live inside measures, also called bars, which group rhythms into recurring patterns. The boundaries between bars are marked by bar lines, vertical lines that run through the staff. A double bar line marks the end of a section, and a final double bar line marks the end of the piece. At the very start of the music sits the time signature, two numbers stacked like a fraction. The top number tells you how many beats fit in each bar; the bottom number tells you which note value counts as one beat.
For example, 4/4 (often written as the common time symbol, a C) means four quarter-note beats per bar. 3/4 means three quarter-note beats per bar, the waltz feel. 6/8 means six eighth notes per bar, but the pulse usually groups them into two larger beats, each containing three eighth notes. Once you understand the time signature, you can scan a bar and predict how the beats line up before you play a single note.
Counting rhythms that beginners find tricky
Beginners tend to struggle most with dotted rhythms, ties, and syncopation. A practical counting approach helps more than any amount of theory reading. Try saying the beat numbers out loud, then subdivide on harder rhythms.
- Dotted quarter followed by an eighth: count “1, 2-and, 3, 4”, where the “and” absorbs the eighth note’s shorter duration.
- Two eighths tied into a quarter: count “1-and, 2, 3, 4”, feeling the tied second eighth as part of the second beat.
- Syncopation, where an accent falls between beats: count in eighth notes throughout, for example “1-and-2-and-3-and-4-and”, and mark the strong beats in your head.
It helps to clap or tap first before adding pitches. Rhythm is a physical skill as much as a visual one, and the muscle memory of a steady pulse supports the rest of the reading process.
Key signatures and why sharps and flats cluster in one place
The group of sharps or flats at the start of a piece, right after the clef, is the key signature. It tells you which pitches are consistently raised or lowered throughout the music, and it removes the need to write an accidental on every affected note. The order in which sharps and flats appear is fixed, which is one of the small mercies of the system.
You will see the same pattern over and over in the key signature. Sharps appear in the order F, C, G, D, A, E, B, and flats in the reverse order, B, E, A, D, G, C, F. Once you can read that pattern, you can read any key signature in a few seconds, even one you have not seen before.
If a note carries an accidental, a sharp, flat, or natural sign placed directly in front of it, that accidental overrides the key signature for the rest of the measure. A natural sign cancels a previous sharp or flat, also within the same measure. This is a small but vital rule: accidentals expire at the bar line unless the key signature reasserts them.
The main key signatures at a glance
The table below shows the most common key signatures and how many accidentals each contains. It also gives the relative major or minor relationship that often appears in exam and learning material.
| Key signature | Sharps or flats | Relative minor | Where it commonly appears |
|---|---|---|---|
| C major / A minor | 0 | A minor | First pieces, folk songs, simple chorales |
| G major / E minor | 1 sharp (F#) | E minor | Beginner violin and guitar, hymns |
| D major / B minor | 2 sharps (F#, C#) | B minor | Bright string music, classical violin solos |
| F major / D minor | 1 flat (Bb) | D minor | Beginner wind band, many popular songs |
| Bb major / G minor | 2 flats (Bb, Eb) | G minor | Trumpet and clarinet repertoire, jazz |
| A major / F# minor | 3 sharps (F#, C#, G#) | F# minor | Violin concertos, classical guitar |
| Eb major / C minor | 3 flats (Bb, Eb, Ab) | C minor | Concert band, some piano sonatas |
Notice that each major key has a relative minor that shares its key signature. A piece in A minor uses the same key signature as C major; a piece in C minor uses the same signature as Eb major. The choice between relative major and minor is a question of where the music’s tonal centre feels at rest.
Accidentals, naturals, and cautionary signs
Within a measure, an accidental takes precedence over the key signature, but it does not extend to the next measure. A natural sign within a measure cancels an earlier sharp or flat in that measure and reasserts the pitch in its natural form. Some scores use cautionary accidentals, a sharp, flat, or natural in parentheses, when a note appears in a later measure but the previous accidental might mislead the eye. They are not a hard rule of notation, but you will see them in edited editions of older music and in performance parts where readability is critical.
Dynamics, articulation, and the shape of a phrase
Once you can read pitches and rhythm, the next layer tells you how to play them. Dynamic markings control volume, and the most common are easy to memorise because their Italian abbreviations are intuitive.
- pp (pianissimo) is very soft.
- p (piano) is soft.
- mp (mezzo-piano) is moderately soft.
- mf (mezzo-forte) is moderately loud.
- f (forte) is loud.
- ff (fortissimo) is very loud.
Gradual changes use hairpins and the words crescendo (getting louder) and diminuendo or decrescendo (getting softer). A hairpin opening to the right, like <, is a crescendo; one closing to the right, like >, is a diminuendo.
Articulation markings shape the way each note begins and ends. A small dot above or below a note is staccato, a short detached sound. A curved line over a group of notes is a slur, played or sung smoothly in one breath or bow. A short straight line above a note is an accent, a slightly stronger attack. A tenuto mark, a short horizontal line, asks for the full value of the note with a gentle emphasis. These symbols are small but they carry a great deal of expressive meaning.
Common symbols you will meet in your first year
Some symbols appear in nearly every piece, and recognising them quickly saves real time. The list below is a good working vocabulary for the first several months of study.
- Repeat signs: thick and thin double bar lines with two dots, which send you back to the start of the section or to an earlier repeat sign.
- 1st and 2nd endings: bracketed measures at the end of a repeated section, where you play the first ending on the first pass and the second on the repeat.
- Dal segno (D.S.) and Dal capo (D.C.): jump-back instructions that take you to a sign or to the beginning of the piece.
- Fine: a point in the music marked as the end of a repeated section, usually paired with D.C. or D.S.
- Fermata: a curved arc with a dot under it, asking the performer to hold the note or rest longer than its written value, at the performer’s or conductor’s discretion.
- 8va (ottava): a small “8” with a dashed line above or below the staff, asking the performer to play the notes an octave higher or lower than written.
You do not need to memorise every symbol before you start playing. Most pieces use a small core set, and the rest can be looked up as you meet them.
Step, skip, repeat: how melodies move on the staff
When you look at a melody, you will notice three basic kinds of motion between notes. A step is the distance from one line to the next, or one space to the next: the smallest movement available on the staff. A skip jumps over an intermediate line or space, for example from the bottom line to the middle line of the treble clef. A repeat is the same pitch played again. Recognising these patterns is useful because it tells you what your hand, voice, or instrument has to do next.
Many beginner melodies are largely stepwise, with occasional skips. As you read more repertoire, the skips tend to grow larger, the rhythms become more varied, and the dynamics change from bar to bar. The habit of reading motion, not just individual notes, is one of the best shortcuts to fluency.
A short practice routine that actually builds fluency
Reading is a motor skill, and motor skills respond to repetition with small increases in difficulty. A short, focused daily routine is more useful than long, occasional sessions. The sequence below is realistic for a beginner who is starting from scratch.
- Warm up for two minutes by tapping a steady pulse in 4/4, then in 3/4, to anchor the inner metronome.
- Read five minutes of rhythm-only exercises, clapping or tapping the rhythms from a beginner method book without worrying about pitch.
- Read five minutes of single-line melodies, naming the notes out loud and then playing or singing them slowly.
- Spot-check your reading by closing the book and writing out the first measure from memory, then compare it to the score.
- Finish with one minute of slow sight reading from a fresh, simple piece, treating mistakes as information about what to drill next.
The last item is the most important. Sight reading is not a test; it is a workout. Each new piece exposes patterns you have not met before, and the variety is what builds flexibility. Many professional musicians keep a sight-reading habit for this reason, even after decades of playing.
Tools that help, and what to skip for now
There is a real market of tools for the beginner reader, and not all of them are worth the money at the start. A few choices tend to serve new readers well.
- A beginner method book matched to your instrument, with short examples that introduce one or two ideas at a time.
- A simple manuscript book, sometimes called a notation notebook, for writing out short melodies by hand. Handwriting notation is one of the fastest ways to learn what the symbols actually look like in your own hand.
- A metronome app for checking pulse and subdividing beats. Mechanical metronomes are lovely, but a phone app is enough at the start.
Music theory apps and games can be useful for short bursts, but they are not a substitute for reading actual scores. The eye needs time on real notation, not just on quiz cards, and a method book provides that. If you want a single free resource for orientation, the Wikipedia overview of musical notation is a clear, well-illustrated starting point.
How notation differs slightly between instruments
Most of the system you have just learned is universal, but a few conventions shift between instruments. Transposing instruments, such as the Bb trumpet, the French horn in F, and the clarinet in Bb or A, read a written part that sounds at a different pitch than the one written. The notes on the page are the same; the sounding pitch is not. This is why a Bb trumpet part and a piano part in the same key look different even though they sit in the same concert-pitch key.
Piano and organ use the grand staff, two staves joined by a brace, with the treble clef on the upper staff and the bass clef on the lower. Organ music, including the kind written for builders and players served by organ stops explained, often includes registration changes in addition to the usual pitch, rhythm, and dynamic notation. Vocal music often combines the treble and bass clefs and adds lyrics beneath the notes, with syllable alignment that takes some practice to read smoothly. String parts frequently use multiple ledger lines above the staff for high passages, because the instrument’s range easily exceeds the written staff.
Reading rhythm, pitch, and expression together
The biggest jump in skill comes when you stop reading one layer at a time and start reading all three together. A first-year method book will usually separate them on purpose. Once you can read a line at sight at about half performance tempo, the next step is to combine them in real time. A useful exercise is to read a short line first for rhythm only, then for pitch only, then for both with dynamics and articulation. The three passes feel slow, but the combination is what the music is actually asking for.
Once you are combining layers, you can also start practising score study. Look at a piece you know well from listening, follow the score while the recording plays, and notice how the composer indicated the effects you hear. This is one of the most efficient ways to internalise notation, because you already know what the music sounds like and can match the symbols to the result.
A two-week starter plan for a complete beginner
Plans help when they are short and realistic. The schedule below assumes fifteen to twenty minutes a day, six days a week, which is enough to build real momentum without burning out.
| Day | Focus | Goal |
|---|---|---|
| 1 to 2 | Staff, clef, lines and spaces | Name every line and space in your clef from memory |
| 3 to 4 | Whole, half, quarter, and eighth notes | Clap simple rhythms in 4/4 from a beginner book |
| 5 to 6 | Rests and bar lines | Identify the rest symbols and count them in place |
| 7 to 8 | Time signatures | Read rhythms in 2/4, 3/4, and 4/4 with a steady pulse |
| 9 to 10 | Key signatures with 0 to 2 accidentals | Name the key signature on a new page in under three seconds |
| 11 to 12 | Dynamics and basic articulation | Apply pp, p, mf, f, and staccato to a simple melody |
| 13 to 14 | Combined sight reading | Read a new short piece at a slow, steady tempo |
By the end of the second week, you will not be a fluent reader, but you will be a competent beginner. The most useful habit to keep is consistent daily contact with the page, even if the time is short.
Common mistakes and how to recover from them
Most beginners make similar misreads, and recognising the patterns is half the cure. The list below describes the mistakes that come up most often in early reading.
- Reading the interval direction backwards: moving your eye to the right pitch but assigning it a step in the wrong direction. Slow down and check the line or space directly above or below the previous note.
- Losing the beat after a tied or dotted note: the inner pulse drifts because the longer note is not felt as two joined values. Subdivide on eighth notes until the longer note is secure.
- Forgetting a key signature: the first accidental of the piece is easy to miss. Mark the sharps or flats in light pencil at the start, or run through the order out loud before you begin.
- Ignoring dynamics until the end: dynamics are part of the music, not a final polish. Practise with the dynamics from the first reading, even at slow tempo.
- Stopping after a mistake: a pause to correct an error often costs more time than the original mistake. Mark the spot, keep the pulse, and return to the trouble spot in a separate pass.
Each of these has a simple remedy, and the remedy is almost always the same: slow down, isolate the layer that caused the error, and rebuild the passage in layers. This is the same approach that experienced sight readers use, simply with a more advanced vocabulary.
Where reading notation ends and musicality begins
Reading notation accurately is the price of admission. Musicality is what happens once the page is no longer a puzzle. Phrasing, the way a line rises and falls, lives between the dynamic markings. Rubato, the gentle stretching and compressing of time, is a performer’s choice, not a written instruction in most cases. Style, whether a piece is meant to sound like a Baroque dance or a contemporary ballad, is a matter of context that the notation can only suggest.
As you grow more comfortable with the basic symbols, you can start to read between the lines. Notice where the composer leaves more space, where the dynamic markings are absent in a passage full of activity, where a long slur suggests a single gesture. These cues are part of the notation too, and they are the reason that two performers can read the same page and produce very different, equally valid interpretations.
If your reading leads you toward keyboard or organ repertoire, the next questions are about voicing, registration, and the colours an instrument can offer. A useful next read is organ registration: a practical guide to shaping pipe organ sound, which builds on the same notation foundation and applies it to an instrument where dynamics and colour change in real time.
Building a personal reading habit that lasts
Reading music is one of those skills that quietly improves with steady, ordinary use. A few habits make a noticeable difference over a year.
- Keep a small notebook of new symbols you meet, with a one-line example for each. The act of writing them down makes them easier to recall.
- Read a little every day, even if it is just four measures, and rotate between a piece you know, a piece you are learning, and a piece you have never seen before.
- Listen to the music you are reading, ideally before you start practising it. A known sound makes the symbols easier to attach to.
- Review old material occasionally. A piece that felt hard three months ago is often a quick read now, and the review reminds you how far you have come.
These habits are not glamorous, but they are the engine behind most fluent readers you have ever met. The skill is built in small, repeated deposits, and the page begins to feel less like a foreign language and more like a familiar one. With time, you stop translating the notation into sound and simply read the sound, with the notation as a quiet guide. That is when the small forest of black dots turns into music.
Frequently asked questions
How long does it take to learn how to read music fluently?
Most adult beginners can read simple melodies at a slow, steady tempo within two to four weeks of short daily practice. Reasonable fluency on a single clef typically takes six months to a year, and broader fluency across clefs, keys, and time signatures usually develops over several years. The pace depends on how much you read each day, not on talent or age.
Do I need to read music to play an instrument?
You do not need to read notation to play by ear, by tab, or by chord charts, and many musicians use those tools happily. Notation becomes useful when you want to play music you have not heard, work with other musicians, study written repertoire, or transcribe your own ideas. For classical, jazz, and most ensemble playing, reading is a core skill.
Which clef should I learn first?
If you play piano, voice, guitar, or any high instrument, start with the treble clef. If you play cello, bass, trombone, or the left hand of the piano, start with the bass clef. Many learners eventually need both, but one clef at a time is the smoothest path.
What is the difference between a key signature and an accidental?
The key signature is the group of sharps or flats placed once at the start of the staff and applied to every occurrence of those notes in the piece. An accidental is a sharp, flat, or natural placed in front of a specific note within a measure, and it overrides the key signature for the rest of that measure. A natural sign cancels a previous sharp or flat, also within the same measure.
How do I count dotted rhythms and ties correctly?
For a dotted note, count the full beat for the original note value, then count half of that value for the dot. A dotted quarter in 4/4, for example, sounds for a quarter plus an eighth. For a tie, treat the two notes as one sustained sound and count the rhythm as if the bar were rewritten with a single longer note in that position.
Is learning to read music harder for adults than for children?
Adults often pick up notation faster than young children in absolute terms, because adults can hold abstract categories in mind and self-direct their practice. The biggest difference is exposure: children who learn an instrument usually have several years of structured weekly lessons, while adults often practise in shorter, more variable blocks. With consistent daily contact, adults reach reading fluency on a similar timeline.
What is the best book for learning how to read music?
A method book matched to your specific instrument is the most efficient choice, because the examples are written for the range and technique of that instrument. For a general introduction to notation, the Wikipedia page on musical notation offers a clear, well-illustrated overview, and most conservatories publish free introductory PDFs that cover the same ground with worked examples.
Can I learn to read music without playing an instrument?
Yes. Sing the pitches, clap the rhythms, and write the notation by hand. Many musicians and conductors develop strong reading skills primarily through singing and inner hearing. The instrument helps, but the notation itself can be studied on its own.
How do I read music written in a different time signature, like 6/8?
Look at the top number for beats per bar and the bottom number for the note value of each beat. In 6/8, the top number tells you there are six eighth notes per bar, but most pieces in 6/8 are felt in two larger beats of three eighths each. Tap or count “1-2-3, 2-2-3” until the pulse feels natural, then add the pitches on top of that framework.
What should I do when I hit a passage I cannot read at sight?
Slow the tempo, isolate the rhythm, isolate the pitches, and rebuild the passage in layers. Mark the spots that confused you, and return to them in short, focused passes over several days. Sight reading improves with variety, so keep moving to new material as well, rather than spending an entire session on a single hard bar.