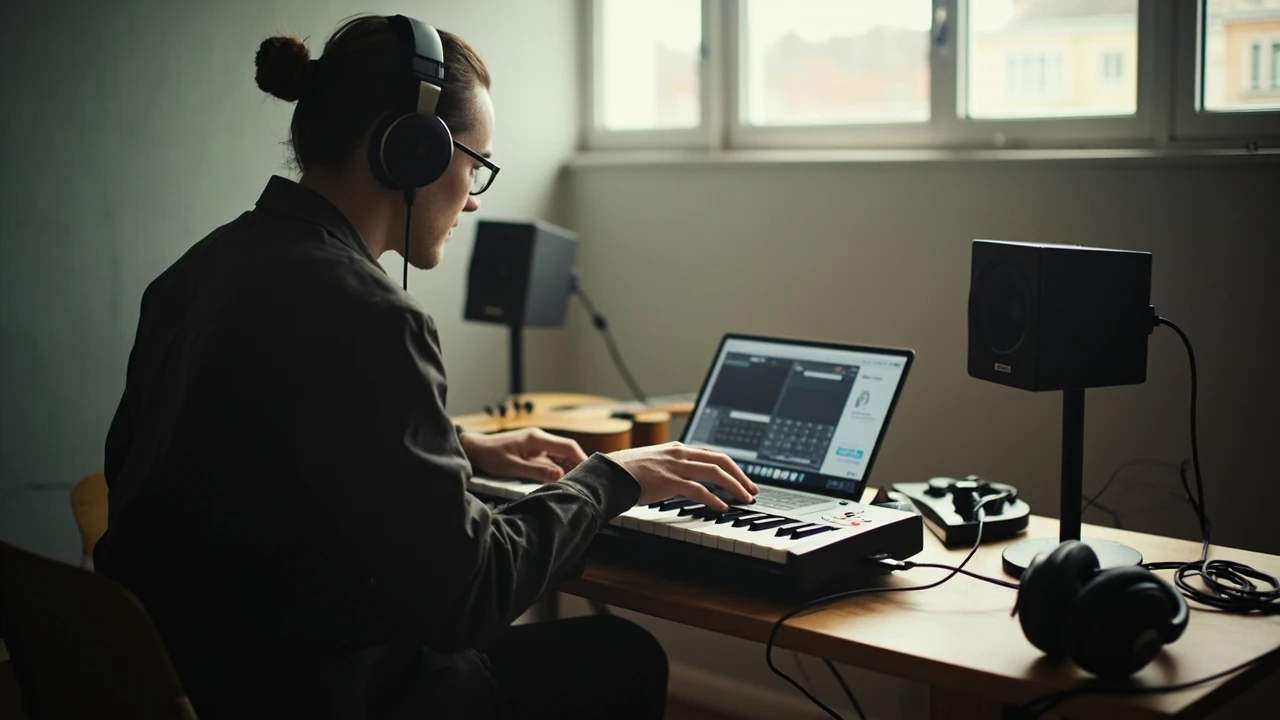
A music lab is a workspace where listening, recording, composing, and analysis happen in the same room rather than as separate hobbies. The phrase turns up in school programs, university sound departments, home studios, and casual forum posts, which is exactly why it confuses people. It can mean a classroom with a piano and a whiteboard, a digital audio workstation on a laptop, or a rack of synthesizers beside a treated wall. In every case the purpose is the same: a music lab is a place where the conditions are arranged so you can investigate how music actually behaves, with your ears, your hands, and a controlled set of tools.
This article focuses on the practical version: a working music lab you can build at home for practice, study, and recording. You will see what separates a music lab from a regular home studio, the core equipment that actually earns its place, how to set the room up so your listening decisions are reliable, and how to build productive routines around it. Because the site you are reading is devoted to pipe organ work, several examples lean toward keyboard instruments and acoustic listening, but the same principles apply to guitars, vocals, electronic production, and composition on a computer. For background on the broader tradition of treating music as a subject of study, the musicology entry at Britannica is a useful companion reference.
What a music lab actually is
The word lab suggests an experimental space rather than a performance space. A chemistry lab is where substances are mixed under controlled conditions and the results are observed. A music lab applies the same logic to sound. You arrange a controlled listening environment, choose a limited set of tools, and run small experiments: trying a different microphone position, comparing two reverbs, isolating a voicing issue, or recording the same phrase three ways to see which interpretation survives the next morning.
That framing is more useful than a list of gear. Many home studios are storage rooms with a microphone and an interface. They can capture a take, but they do not help the player understand what is being heard. A music lab, in contrast, is organised around questions. You decide what you want to learn, you arrange the room and the signal chain so the question can be answered cleanly, and you record or take notes so the answer can be checked the next day.
Music lab versus home studio versus practice room
People use these terms interchangeably, but they describe different spaces.
- Practice room: built for repetition. A music stand, a metronome, lighting that does not fatigue the eyes, and acoustic treatment that flatters the instrument. The room helps a player sustain focus while repeating a passage.
- Home studio: built for capture. A treated room, a computer, an audio interface, microphones, and monitors chosen for translation. The room helps a player record a clean take.
- Music lab: built for comparison. A neutral listening position, a small library of reference tracks, measurement tools, and a small set of plugins or outboard gear that can be swapped quickly. The room helps a player decide between options.
The differences show up in small details. A practice room often has a rug and soft furniture because those help a player relax. A home studio usually has hard, parallel surfaces damped with broadband absorbers, because a clean recording needs a dry signal. A music lab needs both: enough comfort to sit for an hour, and enough acoustic neutrality that comparisons between two takes or two pieces of gear are meaningful.
Why build a home music lab instead of using a corner of a room
An instrument can be practised almost anywhere, and a laptop in a bedroom can record audio. The argument for a dedicated music lab is reliability. If the listening position changes every session, the ears adjust, the brain compensates, and the conclusion drawn on Monday will not match the one drawn on Friday.
Consider a simple example. You are trying to decide whether a new sample library is brighter than the one currently in use. You load both into the same project, A/B them on the monitors, and pick the one closer to a reference track. If the monitors sit too close to a wall, the bass is exaggerated, and the decision is biased toward whichever library carries more low end. Build the room correctly, and the same comparison returns a different answer. The music lab exists to remove that kind of bias from decisions that affect playing, recording, and teaching.
Who actually benefits from a music lab
The setup is worth the effort for several kinds of musician and educator:
- Students preparing for graded exams who need to record themselves and compare the result to a reference performance.
- Teachers preparing materials who want a neutral room for demonstration recordings and for analysing student submissions.
- Composers and arrangers who need to A/B virtual instruments, reverbs, and microphone simulations without leaving the chair.
- Organists and keyboard players evaluating sample sets, ranks, or alternative voicings for practice and recording.
- Independent producers working alone, who have no engineer to catch a bad mix decision.
Core components of a working music lab
A great deal of money can be spent on a music lab, and most of it will be wasted if the room itself is wrong. The list below is ordered by how much each component affects the accuracy of decisions, not by how exciting it is to buy.
1. The room and its acoustics
Before another piece of gear is bought, the room should be treated. A small rectangular bedroom is a hostile environment for critical listening. Parallel walls create standing waves, the window reflects midrange, and the corner behind the desk exaggerates the bass. None of this is a personal failing; it is just physics.
The minimum effective treatment is a pair of broadband absorbers at the first reflection points on the side walls, a thicker absorber or bass trap in each front corner, and either a rug or a ceiling cloud above the listening position. A professional studio is not required. What is required is enough treatment that the same recording sounds the same on Tuesday morning as it did on Friday night.
2. Monitors and headphones
Two reference sources are better than one. Near-field monitors reveal how a mix will translate to small speakers and earbuds. Closed-back headphones reveal details that monitors smear, especially low-level noise, click bleed, and edits in the middle of a quiet passage. Open-back headphones are useful for long sessions and for cross-checking a mix in a wide stereo image, but they leak sound into microphones.
Calibrate the monitor level so that a pink noise generator at -20 dBFS produces roughly 78 to 83 dB SPL at the listening position, measured with a phone app or a proper SPL meter. Calibrate the headphone level the same way using a small measurement, so that headphone listening and monitor listening carry similar loudness weight.
3. A neutral audio interface
The interface is the bridge between the analog and digital sides of the lab. Its only job is to add as little of itself to the signal as possible. Dozens of inputs are not needed. Clean preamps, stable drivers, and low latency are needed, so that monitoring through the interface does not feel laggy.
4. A reference library and a measurement microphone
Reference tracks are tracks you trust. Pick three or four commercial recordings in the genre worked in most, and keep them in a dedicated playlist. When your own work is A/B’d against them at matched loudness, problems appear that vanish when only the own mix is heard. A measurement microphone, even a budget model, lets the room response be checked and the monitor positions verified.
5. A computer and a digital audio workstation
Any modern laptop will run a DAW competently for a small project. What matters more is the disk and the session template. A solid-state drive is mandatory. A session template with the reference bus, the monitoring controls, and the default effects already loaded saves a surprising amount of decision fatigue during a session.
6. Instruments and controllers
For a keyboard-focused music lab, the obvious instrument is a weighted MIDI controller with at least 61 keys. For an organ-focused lab, a single manual of 61 keys plus a set of assignable swell pedals allows registrations to be practised in silence. For a guitar-focused lab, an audio interface with a high-impedance input removes a common source of muffled tone. The instrument should be chosen on the basis of the questions that need answering, not on what looks impressive on a desk.
Designing the room for accurate decisions
Treatment without positioning is wasted. The most common mistake in a home music lab is pushing the desk against a wall so the keyboard or laptop can share space with a bookshelf. That placement excites the boundary behind the monitors and colours the low end of every decision. The fix is structural: the listening position and the speakers form an equilateral triangle, and the front of each monitor sits well clear of the wall behind it.
Listening position and monitor placement
Three rules cover most situations.
- Place the listening position roughly 38 percent of the way into the room from the front wall, not exactly in the centre. This avoids the strongest axial mode nulls and peaks.
- Keep the speakers at least 30 to 50 centimetres from the front wall, and toed in so the acoustic axes cross just behind the head.
- Make sure the tweeters are at ear height, not below the desk surface, and that nothing large sits between the listener and the monitor cone.
These rules look like a small thing. They are not. Every frequency below about 200 Hz in the monitoring chain is shaped by where the listener sits in the room, and every choice about bass, balance, and reverb inherits that shape.
Wiring, power, and grounding
Audio gear behaves badly when the power is dirty. Plug the computer, the interface, and the monitors into a single power conditioner, and avoid sharing that circuit with a fridge, an air conditioner, or a kettle on the same ring main. Balanced cables for monitor feeds (TRS or XLR) reject hum that single-ended cables pick up. Ground loops, usually heard as a low 50 or 60 Hz buzz, are almost always solved by removing a spare ground connection or by using a transformer-isolated DI box on an offending cable.
Setting up a small home music lab step by step
Below is a realistic sequence for a first-time setup. It assumes a room of about 12 to 18 square metres, a budget in the low four figures, and a primary interest in keyboard instruments and recording.
Step 1: define the questions your lab must answer
Write down three questions the lab should help answer. Examples:
- Does this sample set sound more like a real organ than the one currently in use?
- Is this take more in tune than yesterday’s take?
- Which of these two reverbs fits the program best?
Those questions decide priorities. If the main task is comparing sample sets, excellent monitors and a quiet room are needed. If the main task is recording, a clean preamp and a single good microphone are needed. If the main task is teaching, a camera and a screen are needed.
Step 2: pick the listening and capture chain
For a starter kit, a clean two-input audio interface, a pair of small near-field monitors, closed-back headphones, and a measurement microphone will cover the majority of decisions. Add a MIDI controller, an instrument, and a DAW, and a working music lab is in place. Resist the temptation to add a mixer, a hardware compressor, or a second pair of monitors at this stage; every additional device is another variable that cannot yet be controlled.
Step 3: treat the room
Order four to six 100-millimetre mineral-wool panels in wooden frames, hang two on the side walls at first reflection points, place two in the rear corners as bass traps, and lay a heavy rug between the desk and the monitors. That single change will improve the accuracy of every other piece of gear owned.
Step 4: build a session template
Open the DAW, set the project tempo, sample rate, and bit depth, and create a small set of buses:
- Reference bus: routes reference tracks to the main output at a fixed fader position.
- Capture bus: the input for whatever is being recorded, with a high-pass filter engaged to remove rumble.
- Monitor bus: includes a dim control, a mono sum, and a level calibration tone.
Save that as a template. Every new session starts from it, so the default state of the room is always the same.
Step 5: write a short workflow
Without a written workflow, the lab drifts toward whatever was opened last. A simple three-step rule works well:
- Listen to the reference track first, at matched loudness, for thirty seconds.
- Make the change that was the reason for sitting down, and record the result.
- Log what was heard, including the wrong guesses, in a notebook or a plain text file.
That log is the underrated part of a real lab. It turns the space from a place where music is played into a place where it is studied.
How a music lab changes the way you practise
A practice room helps sustain effort. A music lab helps convert effort into knowledge. The difference is the feedback loop. When a take is recorded at a fixed level, in a treated room, against a reference track, the gap between what was intended and what was produced becomes audible. The first time this is done with a slow movement, the dynamics that were imagined will probably not match the dynamics that were played. That is the kind of finding a practice room cannot give.
Recording yourself without sounding worse than reality
Three habits keep recorded takes useful for practice.
- Use a single microphone at a fixed distance, not whatever is on the desk. Variations in level between takes are usually variations in microphone position.
- Match the playback level to the level of a reference recording. Loudness shapes how dynamics, intonation, and balance are judged.
- Listen to the recording twice in a row, the first time taking notes, the second time confirming those notes. The first pass is dominated by the surprise of hearing yourself, and the second pass is closer to how a listener will actually respond.
Common mistakes when building a music lab at home
Most home music labs fail in the same ways. The list below is short on purpose.
Treating the room last
The room is heard more than the monitors. Treatment should be bought before cables are upgraded, before the interface is swapped, before a subwoofer is added. A treated room with cheap monitors makes better decisions than an untreated room with expensive ones.
Choosing gear for its frequency response on paper
Manufacturer graphs describe the speaker in an anechoic chamber, not in the room. Trust measurements taken at the listening position with a calibration microphone, and trust reference tracks. The graph and the ears will agree on the big things and disagree on the small things, and the small things are where the work is.
Skipping the metronome
A music lab without a tempo reference is a music room with extra steps. Every comparison, from intonation to balance, needs a stable sense of pulse, or the ear will drift between takes. A small digital metronome on the capture bus, hidden from the recording, costs nothing and changes everything.
Adding too many instruments
Each new instrument is a new variable. If the music lab is also the rehearsal space for three different projects, there will not be time to learn the room. Pick a small set of instruments that share a problem space, and keep the rest stored out of sight.
Tools that earn their place in a music lab
The list below is deliberately short. Every item is a tool that turns up repeatedly in a working lab, and every item is a better purchase than the next flashy alternative.
Reference tracks you can trust
Use three to five tracks that have been heard on a large number of systems, in the genre actually worked in, and that are personally found pleasant. Tracks heavily mastered for streaming should be avoided, because the loudness war has made them poor references for dynamics. Pick a couple of chamber recordings, a couple of solo piano or organ recordings, and one modern production in the main genre.
A measurement microphone and a room analysis tool
A USB measurement microphone and a free room analysis tool will tell where the room is reinforcing some frequencies and cancelling others. The first analysis will look intimidating; the second will start to make sense; the third will shape how the desk is placed for the rest of the lab’s life.
A small library of effects
For a keyboard-focused lab, a high-quality convolution reverb with a library of recorded spaces is more useful than a rack of analog outboard. A good convolution reverb places the instrument in a real acoustic without recording in that acoustic, which is exactly the kind of comparison a lab is built for.
A reference-grade pair of headphones
For mixing and detailed editing, a single reference pair of closed-back headphones is enough. Save the open-back pair for long editing sessions, and use the closed-back pair for the final mix check. Pick a model that is widely used, so a mix translated to that specific headphone curve can be found, and so that other people’s notes on the same model are useful.
Music lab setup for specific goals
The phrase music lab means different things to different people. The table below maps a few common goals to the equipment and habits that actually pay off.
| Goal | Minimum useful setup | Key habit | What to avoid |
|---|---|---|---|
| Practising an instrument with feedback | Audio interface, one microphone, closed-back headphones, DAW | Record every session, A/B against a reference, log the gap | Listening back on phone speakers only |
| Comparing virtual instruments or sample sets | Treated room, two pairs of monitors, headphones, blind test setup | Match loudness with a meter before each A/B | Trusting the marketing copy of a sample library |
| Teaching online or in person | Camera, lighting, screen share, microphone, monitors | Record every lesson for the student, with a short written summary | Streaming on a consumer laptop in a bright, untreated room |
| Recording small ensemble or solo work | Two microphones, two preamp channels, treated room, monitor path | Track first, mix later, save the rough mix | Recording a final take before the room is treated |
| Composing and arranging | MIDI controller, sample library, monitors, MIDI capture bus | Capture ideas first, decide structure later | Buying a new library instead of finishing a piece |
Maintenance, calibration, and the slow art of keeping the room honest
A music lab drifts. Monitors shift on the desk, the rug moves, a panel falls off the wall, a cable gets replaced with a different one, and the next time the chair is sat in, the decisions made will be slightly different from the ones made last month. None of these changes is large on its own. Together they are a slow loss of accuracy.
The fix is a simple calendar task. Once a month, run a thirty-minute check: confirm the monitor positions, run a quick room measurement, listen to the reference tracks at the calibrated level, and replace anything that has shifted. It is a small investment for a large return in long-term reliability.
Documenting the setup
Take three photographs of the lab in its calibrated state: a wide shot showing the room, a shot from the listening position showing the monitor triangle, and a shot of the patch bay or the cable runs. Save those in a folder named “lab baseline”. When something is changed, update the photos. The discipline is mildly annoying the first time, and indispensable the fifth time it is unclear whether the left monitor sits 12 or 18 centimetres from the wall.
Choosing equipment without overspending
A common trap in a music lab is treating it like a hi-fi project, where each upgrade is justified by a small audible gain. In a working lab, the limiting factor is usually not the gear. It is the discipline of using the gear consistently. A modest audio interface with stable drivers, a modest pair of monitors placed correctly, and a treated room will outperform a flagship interface driving expensive monitors on an untreated desk.
A useful rule: spend roughly half the budget on the room and the monitoring path, and the rest on the capture chain and the instruments. The room is the part that cannot be upgraded by changing a cable.
| Budget tier | Room treatment | Monitors and headphones | Interface and capture | Instruments and controllers |
|---|---|---|---|---|
| Entry (around 1000 currency units) | Four 100 mm panels, two corner traps, a heavy rug | One pair of small near-field monitors, closed-back headphones | Two-input interface, one measurement microphone | 61-key weighted MIDI controller, single dynamic microphone |
| Mid (around 3000 currency units) | Six to eight broadband panels, two bass traps, ceiling cloud | Main near-field monitors plus a second smaller pair, open-back reference headphones | Four-input interface, two condenser microphones, two preamp channels | 88-key weighted controller, additional MIDI pedals, organ MIDI console if needed |
| Advanced (around 7000 currency units and above) | Custom broadband and tuned bass traps, full room measurement and calibration | Main monitors with a matched subwoofer, multiple reference headphone models | Eight-input interface, dedicated preamp, outboard converters | Acoustic instrument plus silent practice option, multiple controllers, hardware effects |
How a music lab fits into organ and keyboard practice
For organists, the music lab idea is particularly useful because the instrument is rarely available in a domestic setting. A weighted MIDI controller connected to a sample library, monitored through a neutral pair of speakers or closed-back headphones, becomes a stand-in for the real pipe organ. The lab is where registrations can be tried, alternate voicings compared, and small pieces recorded for self-review without occupying a church console.
For keyboard players more generally, the same logic applies to digital pianos, hybrid pianos, and sampled grand pianos. A treated room, a matched listening level, and a small set of reference recordings turn a keyboard rig into an instrument that can be studied rather than only played. The practice of recording, listening back, and logging what was heard is the part that turns the rig into a music lab.
Frequently asked questions
What is the difference between a music lab and a music studio?
A music studio is a place designed to capture performances and produce recordings. A music lab is a place designed to investigate sound and to make decisions about it. The two overlap, and many home setups do both jobs, but the priorities differ. A studio cares about the quality of a final recording; a lab cares about the reliability of a decision.
Do I need an acoustic piano or organ in my music lab?
No. Most home music labs use a weighted MIDI controller, a digital piano, or a virtual organ loaded on a computer. The instrument is a controllable signal source, and the lab’s job is to reveal what that source is doing, not to add acoustic character of its own. An acoustic instrument is welcome, but it is not required.
How small can a music lab be?
A useful music lab can fit into a three-by-four-metre room if the room is treated and the monitoring path is calibrated. The minimum size is determined by the wavelength of the lowest frequency that needs to be heard accurately. For most home setups, a real-room response down to about 40 to 50 Hz is achievable in a small room with careful placement and a couple of bass traps.
Is a music lab useful for someone who only plays, never records?
Yes, but in a quieter way. The lab helps a player document progress, compare takes from different days, and check intonation, voicing, and balance against a reference. The recording is a side effect; the value is in the comparison.
What is the single most important upgrade to a basic home music lab?
Room treatment. A pair of broadband absorbers and two corner bass traps will do more for the accuracy of decisions than any upgrade to the interface, the monitors, or the computer.
Can a music lab replace a music teacher?
No. A lab supports a teacher, and a good teacher uses a lab well, but a lab cannot diagnose a posture problem, hear a student’s anxiety, or design a two-year curriculum. Treat the lab as an instrument of practice, not a substitute for a human mentor.
How is a school music lab different from a home music lab?
A school music lab usually combines individual workstations with a teaching position, headphone cue mixes for each student, and software that can be locked for assessment. A home music lab is usually a single seat optimised for one person, with a single cue mix. The principles of treatment, calibration, and reference listening are the same in both.
Do I need a measurement microphone to run a music lab?
A useful lab can be run with a phone-based SPL meter and a careful ear, but a measurement microphone is a small investment that pays back quickly. It removes one of the most common sources of error: trusting the ears about a frequency response that is shaped by the room rather than by the monitor.
How long does it take to set up a basic music lab?
For a single room with treatment, an interface, a pair of monitors, and a session template, a careful first-time setup takes two to three full days, including cable runs, panel installation, and the first room measurement. After that, a monthly thirty-minute check is enough to keep the lab honest.
What is the best first reference track for a music lab?
Pick a recording that has been heard on a great many systems, that is well recorded, and that is personally found honest. A solo piano or solo organ recording is often a good first reference because the instrument is a single source, the room is a deliberate choice, and there is nowhere for a producer to hide. Use the same reference for every critical listening session, so the ear learns it well.
A music lab is a small private space for asking honest questions about how music behaves in the hands and in the room. The gear is the easy part. The harder and more rewarding work is the discipline of comparing takes, trusting reference tracks more than mood, and writing down what was heard so next year’s work is anchored to this year’s findings. Start with the room, add only the gear that earns its place, and keep the workflow small enough to repeat every week.