Synthesizer guide: from source to output
A synthesizer makes a signal path playable. Oscillators, samples, filters, amplifiers, envelopes, modulation, sequencing, keys, pads, software, converters, and speakers may all participate. This synthesizer guide traces the path from source to output, then covers practice, maintenance boundaries, documented history, repertoire, and inspection.
Sources, filters, envelopes, and output
The mechanism begins with a source and follows it through spectrum, amplitude, time, and control. Analog, digital, modular, sample-based, and software instruments implement the path differently, but naming each stage prevents random knob turning.
Oscillator and sample source. Oscillators create periodic or noise signals; samplers replay stored recordings. Pitch, wave shape, sample rate, interpolation, and alias control affect output. Multiple sources can detune, sync, modulate, or layer. A waveform label does not describe the complete patch.
Filter. Filters attenuate selected frequency regions and may emphasize cutoff through resonance. Low-pass, high-pass, band-pass, and multimode designs behave differently. Envelope and key tracking can move cutoff over time and register. High resonance may self-oscillate on some designs.
Amplifier and envelope. An amplifier controls level, while an envelope shapes attack, decay, sustain, and release. Sustain is a level, not a duration. Separate filter and amplifier envelopes can create complex motion. Clicks may come from abrupt transitions, voice stealing, or programming.
LFO and modulation. Low-frequency oscillators, envelopes, velocity, aftertouch, wheels, and sequencers can control parameters. Depth and polarity matter as much as destination. Modulation creates vibrato, tremolo, sweeps, rhythm, and instability. Route one source clearly before building a matrix.
Voices and allocation. Monophonic instruments play one note at a time; polyphonic designs allocate several voices. Unison stacks voices and can reduce available polyphony. Stealing rules affect releases and legato. A large voice count is useful only when the patch and music need it.
Output path. Effects, mixers, converters, outputs, amplifier, speakers, and room complete the instrument. Internal clipping can occur before the master volume. Stereo patches may collapse poorly to mono. Gain-stage each section at a conservative listening level.
| Synth stage | Function in the patch | Programming or inspection question |
|---|
| Source | Creates raw signal | Oscillator, sample, noise |
| Filter | Shapes spectrum | Cutoff, resonance, mode |
| Amplifier | Sets level | Gain and voice envelope |
| Modulation | Moves parameters | LFO, envelope, performance control |
| Sequencing | Organizes events | Clock, division, gate, reset |
| Output | Reaches listener | Effects, converters, speakers |
Playing and critical listening
Playing the synthesizer includes patch design, gain structure, modulation depth, keyboard or pad gesture, timing, and listening level. A good patch responds to performance and leaves room in an arrangement rather than demonstrating every feature simultaneously.
Start from an initialized patch. One source, open filter, simple envelope, and no effects make cause and effect audible. Save a copy before adding complexity. Change one parameter family at a time. Initialization differs by instrument.
Design with a role. Decide whether the patch is bass, lead, pad, percussion, texture, or effect. Register, envelope, spectrum, and stereo width should support that role. Leave space for voices and drums. A solo patch can be too dense in a mix.
Performance controls. Velocity, aftertouch, wheels, pedals, ribbon, knobs, and macros turn a patch into an instrument. Map ranges that remain controllable. Practise gestures after programming. Automation should not erase live phrasing.
Tuning and reference. Oscillators may follow equal temperament, alternative scales, drift, or calibration offsets. Analog instruments can need warm-up and service. Tune within the ensemble context. Do not claim fault from one cold-start reading.
Sequencing and timing. Arpeggiators and sequencers organize events while envelopes and effects create internal rhythm. Clock source, division, swing, gate, and reset position matter. Latency belongs to the full system. Record the synchronization method with the patch.
- Initialize before diagnosing a complex patch.
- Design for one musical role at a time.
- Keep gain conservative through every stage.
- Map performance controls to useful ranges.
- Document clock, tuning, samples, and modulation routes.
Care, maintenance, and safe boundaries
Routine care separates backups, cleaning, connector checks, and safe power habits from high-voltage repair, internal calibration, battery replacement, failed displays, and vintage component work. Opening an instrument can create shock and damage risk.
Backup and documentation. Export patches, samples, sequences, and settings in more than one location. Record software versions and external dependencies. Photograph modular patches or save routing notes. A preset without its samples or tuning file is incomplete.
Controls and connectors. Use dust covers and suitable dry cleaning; exercise controls gently and test cables separately. Do not spray cleaner through panel gaps. Support heavy plugs and avoid side load. Intermittent faults need systematic diagnosis.
Power and internal work. Use the specified supply, voltage, polarity, and grounding. Vintage and mains-powered units may retain dangerous voltages. Do not substitute an adapter by connector shape alone. Qualified technicians should handle internal power and calibration work.
Batteries and storage. Some instruments use batteries for memory or clocks, and leakage can damage boards. Replacement may require soldering or data backup. Store in controlled conditions and inspect documented service intervals. Do not invent a battery schedule without the model manual.
- Back up patches and external files in more than one place.
- Use only specified power supplies and grounding.
- Keep sprays and liquids outside the panel.
- Use technicians for mains, calibration, batteries, and vintage boards.
- Record software, media, and editor dependencies.
History and evolution
The Smithsonian's Analogue Music Synthesizer Oral History Project preserves first-person accounts of inventions and working practice. The general synthesizer history supplies the wider chronology without reducing it to one inventor.
Electronic precursors. Late nineteenth- and early twentieth-century electronic instruments explored oscillation, amplification, and new performance interfaces. The Telharmonium, theremin, and Ondes Martenot solved different problems. They were not simply incomplete modern synthesizers. Each joined technology with a distinct repertoire.
Studio synthesis. Postwar studios used oscillators, filters, tape, splicing, and control systems for composed electronic sound. The RCA Mark II Sound Synthesizer was installed at Columbia-Princeton in 1957. Large systems separated composition from portable performance. Tape remained part of the instrument.
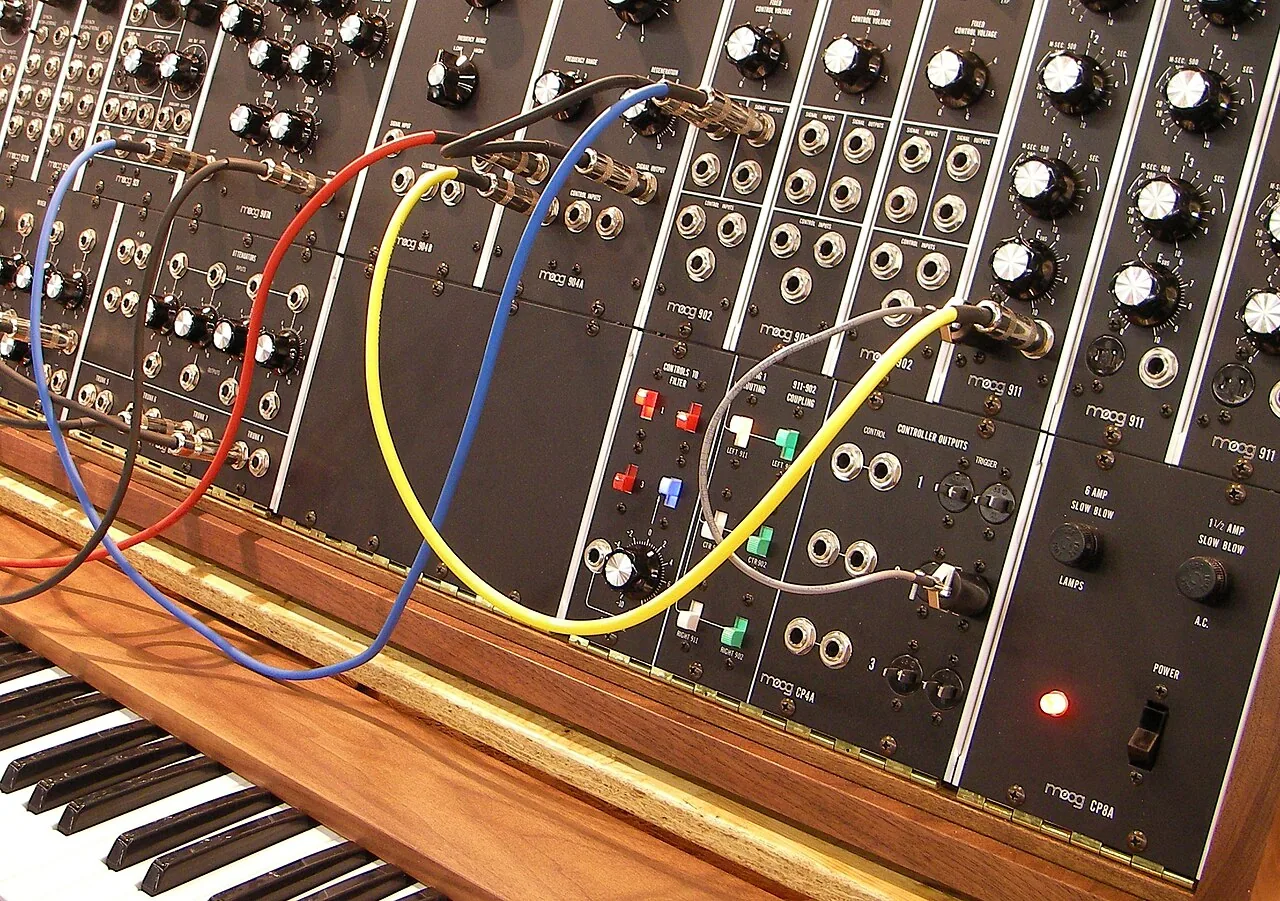
Moog and Buchla. Robert Moog and Don Buchla developed influential voltage-controlled modular systems during the 1960s. Their interfaces and musical communities differed. Modules made control relationships visible through patching. Credit belongs to teams, musicians, and parallel invention.
Public performance and portability. Moog instruments reached recordings and a 1969 MoMA concert-demonstration; compact designs followed. The Minimoog entered production around 1970 and normalized an integrated keyboard signal path. Portability changed touring and studio use. Modular practice continued beside fixed architectures.
Digital control and MIDI. Digital synthesis, sampling, memory, and microprocessors expanded during the 1970s and 1980s. MIDI 1.0 appeared in 1983 and enabled cross-manufacturer note and control messages. It did not transmit audio. Later software instruments moved synthesis into general computers.
Repertoire and musical context
Synthesizers appear across experimental music, pop, film, electronic dance music, rock, hip-hop, theatre, worship, installation, and sound design. The tone generator isolates basic waveforms, while the Instrument Atlas compares designed electronic spectra with acoustic sources.
Electronic and popular music. Synthesizers shaped experimental composition, disco, pop, rock, industrial, ambient, techno, house, and many other practices. Genre sound comes from arrangement and production as well as one machine. Historic patches can be studied without freezing the instrument in nostalgia. New work need not imitate acoustic sources.
Film, games, and theatre. Designed timbre can suggest place, scale, motion, tension, or an impossible object. Recall and synchronization matter in production. Layered acoustic and electronic sources often work together. A patch should survive the intended playback system.
Hip-hop and performance. Synths, samplers, drum machines, and sequencers became intertwined in beat production and live sets. Hands-on timing, filtering, bass design, and resampling shape style. Preset choice is only the beginning. Credit specific artists and scenes rather than treating technology as the author.
Buying, documentation, and inspection
Power requirements come first in a synthesizer inspection, followed by physical controls, every key or pad, audio and control ports, tuning, noise, memory, and documented service. Software-dependent features need a compatibility plan without assuming indefinite vendor support.
Power and startup. Confirm the exact supply and observe startup, display, tuning, fans, relays, and error messages. Allow documented warm-up where relevant. Intermittent booting can signal deeper faults. Do not repeatedly power-cycle a failing vintage unit.
Keys and controls. Test every key, velocity, aftertouch, pad, encoder, switch, wheel, slider, and display region. Look for jumps, dead zones, double triggers, and sticky surfaces. Mechanical feel and sensor data are separate. Price scarce parts realistically.
Audio and ports. Test each output, headphone jack, input, MIDI, USB, control voltage, pedal, and memory interface that applies. Use known cables and moderate levels. Check noise and channel balance on an initialized patch. Ports not present on the model should not be assumed.
Voice and tuning. Play sustained notes across voices, registers, unison, and long releases. Listen for missing voices, tuning jumps, clicks, and inconsistent filters. Analog variation can be normal within design. A technician should distinguish character from failure.
Data and compatibility. Verify patch storage, backup, sample loading, editor connection, and required media. Confirm licenses and included content where relevant. Do not rely on an unverified future update. The instrument should remain usable for the buyer's actual workflow.
| Area | Method | Concern |
|---|
| Startup | Correct supply and stable boot | Errors, resets, overheating |
| Controls | Every key and parameter | Dead zones, jumps, double triggers |
| Audio | All outputs on simple patch | Noise, imbalance, missing voices |
| Ports | Known cables and devices | Failed MIDI, USB, CV, pedals |
| Data | Save, load, backup | Missing media or unsupported dependence |
- Does it start reliably with the correct supply?
- Do all voices, keys, controls, ports, and outputs work?
- Can patches, samples, and sequences be backed up and restored?
- Are repairs, battery work, and modifications documented?
- Will the instrument function in the intended setup without promised future fixes?
Documenting a patch from source to output
Start from an initialized patch only when the instrument's initialization behavior is understood. Some models retain effects, modulation assignments, velocity response, or global settings. Save the current sound first. Set monitor level low, play one middle note, and trace the signal in order: oscillator or sample, mixer, filter, amplifier, effects, and output. This sequence turns a complicated sound into a set of audible stages.
Oscillator comparisons need matched pitch and level. Keep one note held, choose a simple waveform, and note octave, tuning, phase or retrigger state, unison, and voice count. Richer waveforms can seem louder because they contain more upper energy. Match perceived level before deciding that one source has more weight. With samples or wavetables, save the exact bank and position because names can change between firmware or library versions.
Filter tests should begin without resonance and modulation. Sweep cutoff slowly at a safe level, then return to a documented point. Add resonance carefully because some designs self-oscillate or create sharp peaks. Record filter type, slope if available, drive, key tracking, and envelope amount. A cutoff number is not portable between instruments; circuit design, scaling, and the source spectrum determine what that number means.
An envelope is easiest to hear on a simple sustained source. Attack controls the rise, decay moves from the peak toward sustain, sustain is a level held while the key remains down, and release follows key-up. Note whether controls display time, rate, percentage, or arbitrary units. Velocity and key tracking may change the apparent envelope. Disable them for a baseline, then restore them deliberately.
Modulation should have a named destination. Write source, destination, amount, polarity, rate, sync state, and any performance control that scales it. A slow pitch LFO, filter envelope, aftertouch route, and random sample-and-hold all solve different musical problems. If several routes move one parameter, mute them one at a time. The patch becomes easier to repair when each motion has an owner.
Gain staging matters inside the instrument as well as at the mixer. Oscillator level, mixer drive, filter compensation, amplifier envelope, effects return, patch volume, and master output can all contribute. Listen for clipping on chords and high voice counts, not only one note. Save headroom before adding distortion. A patch that is quiet at its source and boosted at the end may carry more noise than one balanced through the chain.
Testing control, recall, and compatibility
Controller checks should begin with a simple patch that makes each input obvious. Play every key at several velocities, test aftertouch if present, move wheels through full travel, and turn encoders slowly. Watch for jumps, dead zones, double triggers, or values that move without touch. Record whether the behavior is local, transmitted over MIDI, received from another controller, or visible only in an editor.
Preset recall needs an A-and-B test. Save a copy to a new location, change several audible parameters, reload the saved version, and confirm that sound and assignments return. External samples, user wavetables, multisamples, and global settings may not live inside the preset. Back them up separately. A successful patch save is not proof that the complete performance can be restored on another unit.
MIDI troubleshooting starts with one cable path and one channel. Disable loops, remove mergers and hubs, and send a simple note from a known controller. Then add clock, program changes, continuous controllers, and system messages in stages. Record local control, channel mode, device ID, and routing. A stuck note caused by a loop should not be mistaken for a failing envelope or voice board.
Audio outputs can be compared with a mono patch, centered pan, disabled effects, and known cables. Check main, auxiliary, and headphone paths at moderate level according to the manual. Level differences may be intentional, especially between balanced, unbalanced, instrument, and headphone connections. Crackle, dropout, channel loss, or heat that repeats with one jack belongs in a service report.
Software instruments require the same discipline. Save plugin version, host, operating system, sample path, preset format, oversampling state, and authorization method. Freeze or render an important part before an update. A preset that loads silently after migration may be missing a library rather than corrupted synthesis data. Keep a short dry render as evidence of the intended result.
Buying checks should include startup from cold, display, controls, keybed, outputs, MIDI or USB, storage, battery-backed memory where relevant, and any known expansion. Ask whether factory content and licenses transfer. Vintage units may need warm-up and specialist inspection; modern units may depend on accounts or discontinued editors. Price should reflect condition, documentation, and the practical cost of restoring a complete working system.
End the compatibility note with a minimal reconstruction recipe. Name the source, filter state, amplitude envelope, principal modulation, effect, range, and performance controls. This does not replace the preset. It gives a musician enough information to approximate the musical role on another instrument when the original hardware, library, or plugin is unavailable.
Tuning checks should name the reference, scale, transpose state, pitch-bend range, and any microtuning table. Compare a middle note with a trusted reference after the documented warm-up. Analog drift, sample mapping, modulation, and controller data can produce different patterns. Do not recalibrate from one moving note; follow the service procedure and preserve the original state.
Effects can hide the source. Bypass reverb, delay, chorus, distortion, and mastering one at a time while keeping output safe. If the patch collapses without effects, decide whether that dependency is intentional. Save wet and dry examples. A collaborator then knows whether to rebuild synthesis, processing, or both, and a technician can test hardware without an effect tail masking noise.
Keep a plain-text patch note beside proprietary files. Include bank and program, checksum or file date when available, controllers, tempo, tuning, and dependencies. Storage media and editors fail in different ways. A readable note will not reproduce every nuance, but it can identify the correct backup and prevent an unlabeled version from replacing the working sound.
Verify the backup name and location before ending the session. A clear file date and one dry reference note make later recall much less uncertain.
Frequently asked questions
Is analog always warmer than digital?
Warm is not a measurement and both categories contain many designs. Oscillator behavior, filters, envelopes, converters, gain, modulation, speakers, and programming matter more than a simple analog-versus-digital slogan.
What is the best first synthesizer?
Choose by musical role, interface clarity, key or pad needs, polyphony, portability, connectivity, recall, and budget. A simpler instrument that invites complete patches can teach more than unused depth.
Can a synthesizer guide replace the manual?
A synthesizer guide explains shared concepts, but menu behavior, calibration, power, backup, and updates are model-specific. Keep the correct manual and service information with the instrument.
Why does a patch click?
Abrupt envelopes, zero crossings, voice stealing, modulation jumps, clipping, or failing hardware can click. Simplify the patch and isolate the stage before changing several parameters.
Does MIDI carry sound?
Standard MIDI messages carry performance and control data, not the audio signal itself. Audio needs separate analog, digital, or network routing depending on the equipment.
Should an old analog synth drift?
Some warm-up movement and voice variation may be characteristic, but severe instability can indicate calibration or component trouble. Compare with service documentation and a qualified technician.
What must be tested on a used synthesizer?
Test correct power, startup, every control and voice, all relevant ports, simple audio, tuning, memory, backup, included media, and documented repairs under a repeatable setup.
Conclusion
A synthesizer becomes understandable when source, spectrum, amplitude, modulation, timing, control, and output remain visible. Build simple patches, save dependencies, and test every voice and port before a major decision. Complexity earns its place when the instrument remains playable, recallable, and suited to a musical role.